Showing posts with label Intermediate. Show all posts

Mobile Legend MLBB vs DotA (Selena vs Mirana)

 Hello dota gamers !


Currently Dota 2 is holding The International 11 region Qualifier and on some region already had a winner. SEA ​​is currently playing and we will be waiting quite a while until TI playoff at Singapore. While waiting, I Suggested you to try playing games on your smartphone that I think has a resemblance to DotA. the name of the game is mobile legends. this is one of the videos I tried to make and you can see the hero I use has a resemblance to Mirana. Here is the short video link : 


Here is one of my favourite play in 2 minutes,just click link below :

SELENA POS 1 HIGHLIGHTS IN 2 MINUTES
For full gameplay you can check here :
SELENA POS 4 FULL IN 6 MINUTES

Selena have the same roles like mirana, it's Position four or five. but the good news, the cooldown of the skill is very fast compared to Mirana's arrow. And Selena has double identity. Just play the game and you will know.
But actually, you can use selena in another roles like POS 1(jungler) or POS 2(mid laner)
please watch and don't forget to give like and comment. Dont forget to give your ID so we can play together.

Just chill and wait for TI buddy

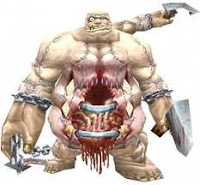
Barathrum-The Spiritbreaker DotA Guide

Roles :


  1. Ganker(Primary)
  2. Carry

Pros :

  • Can last hit easily because of his excellent hitting animation
  • Has one of the best ganking skills thanks to his Charge of Darkness.
  • High movement speed from his Empowering Haste in which chasing a hero is a piece of cake.
  • Powerful Perma-basher(Greater bash), which makes him really fearsome.

Cons :

  • Easily to be harassed in laning phase.
  • Item and team dependent thanks to his Carry roles in the early game.
  • Without his bash, he is nothing.

Drafting : 


Pick Barathrum if:


  • The enemy team has a lot of squishy heroes.
  • The enemy team has no or less disables.
  • Your team has a lot of gankers or disablers.
  • Your team need carry.


Don't Pick Barathrum if:


  • Your team has a lot of carries.
  • The enemy team has a lot of spellcasters or nukers.
  • You haven't read this guide XD.

DotA Barathrum-The Spiritbreaker's Skills


Charge of Darkness

Barathrum fixes his sight on an enemy and starts charging through all objects. Any unit that comes into contact during the charge triggers a greater bash proc. Upon leaving the shadows, Barathrum shocks his opponent into an immobile state for some time. Enemy can only see buff indicator when you are near them. Charge is interrupted if disabled.
Level 1 - Charge at 600 ms then stuns, 1,2 sec stun
Level 2 - Charge at 650 ms then stuns, 1.6 sec stun
Level 3 - Charge at 700 ms then stuns, 2,0 sec stun
Level 4 - Charge at 750 ms then stuns, 2.4 sec stun.

Casting range: Global
Mana Cost: 100
Cooldown: 35


Empowering Haste

His presence increases the movement speed of nearby allied units.
Level 1 - Increases movement speed by 6%
Level 2 - Increases movement speed by 10%
Level 3 - Increases movement speed by 14%
Level 4 - Increases movement speed by 18%

Passive Skill


Greater Bash

Gives a 17% chance to bash enemies across the ground, doing more initial damage and damage as they skid.
Level 1 - Deals 10% of ms as damage., lasts 1 seconds.
Level 2 - Deals 20% of ms as damage., lasts 1.2 seconds.
Level 3 - Deals 30% of ms as damage., lasts 1.4 seconds.
Level 4 - Deals 40% of ms as damage. lasts 1.6 seconds.

Damage type: magical
Cooldown: 1.5
Passive Skill

Nether Strike

Moves you next to your target doing extra damage. Performs a greater bash hit. Casting range improves per level.
Level 1 - Moves Barathrum next to the target, deals 150 damage.
Level 2 - Moves Barathrum next to the target, deals 250 damage.
Level 3 - Moves Barathrum next to the target, deals 350 damage.

Casting Range : 400/550/700 (550/700/850*)
Mana Cost: 125/150/175
Cooldown: 75 (20*)


Skill Build


 (Early Ganker)


Level 1: Charge of Darkness
Level 2: Greater Bash
Level 3:  Empowering Haste
Level 4: Charge of Darkness
Level 5: Charge of Darkness
Level 6: Nether Strike
Level 7: Charge of Darkness
Level 8: Empowering Haste
Level 9: Empowering Haste
Level 10: Greater Bash
Level 11: Nether Strike
Level 12: Greater Bash
Level 13:  Greater Bash
Level 14: Empowering Haste
Level 15: Stats
Level 16: Nether Strike
Level 17-25: Stats(2-10)

Note: This type requires the help of your team that is in the other lane, which means your team that is in the opposing lane of you, should be a disablers. And also players who are in the middle lane are a good player too.

General


Level 1: Charge of Darkness
Level 2: Empowering Haste
Level 3: Greater Bash
Level 4: Empowering Haste
Level 5: Greater Bash
Level 6: Nether Strike
Level 7: Charge of Darkness
Level 8: Charge of Darkness
Level 9: Charge of Darkness
Level 10: Greater Bash
Level 11: Nether Strike
Level 12: Greater Bash
Level 13: Empowering Haste
Level 14: Empowering Haste
Level 15: Stats
Level 16: Nether Strike
Level 17-25: Stats(2-10)

Note : This is the most general skill build for Barathrum. We get Charge of Darkness first to ensure a first blood. Generally this type will start do ganking after level 5.

Item Build


Starting Items


  • Gauntlet of Strength 2x
  • Ironwood branch 2x
  • Tango 2x / Tango 1x + Salve 1x

Core Items


  • Power Tread's
  • Mask of Madness
  • Urn of Shadows
  • Black king Bar

Luxury Items

  • Cuiras
  • Heart of Tarrasque
  • Armlet of Mordiggan

Optional/Situasional Items

  • Blade Mail
  • Vanguard
  • Pipe

Choosing Lane Strategy 


For Carry heroes, usually they go to the lane with disablers and support heroes which can help them to achieve their item fastly. But for me, when i used the early ganker build( See the skill build on above), i do the opposite.But for those of you who want to play the game with something common, then do like most people would do. If you are Sentinel, go on the bottom lane, and as the opposite for the Scourge.

Early game's Strategy


General :

You're a late gamer so you're effective in late game. Buy your items and pick a lane. If the lane is hard because of heavy lane controllers, better call for a lane switch. Last hit creeps as much as possible. When you reach level 4, level 5 or level 6, your teammates will expect a gank so participate in early ganks as much as possible with your Charge of Darkness and try not to get reckless with it.

Early Ganker Type :

Always moving after you reach level 2. With just CoD and Greater Bash + Great Support from your teammates on the lane, it will easy for you to ganking. Do CoD in the last moment before the enemy of you start to running back, make them think that you doesn't have CoD. Believe me, people will take you easy in the early game, so make a surprised of it.

Mid Game's Strategy


Once you have an MoM and some core items then you can kill any lone hero without breaking a sweat. Don't charge enemy heroes who have their comrades with them, except you have your own comrades there too.
Sometimes an expert enemy team will try to lure you out by letting someone squishy from their team come out of the map. Once your fooled and you fell into their gank, you're dead. Even the score is 1 vs 1, Your life is still more precious thanks to your carry roles. What you must do is always cautious with the movement of your enemies.
Note : Don't charge disabler by yourself. It is useless. They can disabling you then running away. If you still want to kill him, bring someone with you. And remember to bring a TP(Town Portal) !

Late Game's Strategy


If you're completely farmed, no one can stop you.When a war occur, let someone from your team initiate first then go for the Charge. As usual, charge the enemy with the most squishy HP. 

That's all for Barathrum-The Spiritbreaker DotA Guide. Enjoy DotA Gamers ! Subscribe us for another hero and item game guide, DotA AI map, and latest thing about DotA.


Nerubian Weaver DotA Guide


Roles :
1. Team's Ganker
2. Carry( Semi-carry for me XD)

Pros:

  • Good Movement Speed
  • Good Agi growth
  • Has a good ultimate skill
  • Easy to last hitting

Cons:

  • item dependent
  • low HP
Drafting:

Pick Nerubian Weaver if :

1. You like to be your team's ganker and carry. Wow, now the vote here choose carry as its favourite !


Don't Pick Nerubian Weaver if :

1. Your enemy pick Nuker type.

2. You haven't read this guide.

Skillset :

1. The Swarm (Hotkey: R)

A swarm of 12 beetles will move towards the target point, each latching onto an enemy unit that it comes into contact with. Each unit will only get latched onto by one creature maximum.
Level 1 – Deals 15 damage per attack, lasts for 8 seconds.
Level 2 – Deals 20 damage per attack, lasts for 12 seconds.
Level 3 – Deals 25 damage per attack, lasts for 16 seconds.
Level 4 – Deals 30 damage per attack, lasts for 20 seconds.
- When a beetle latches on a a target, it will remain there until it is killed or the duration expires.
- Beetles are magic immune, but can be killed in 4 attacks.
- Every 1.5 seconds, the beetle will attack its target, dealing damage and reducing the target’s armor by 1 until the beetle is killed or the duration expires.
- Beetles provide 250/250 sight, but will drop off their target if it becomes invisible.
- Casting range: 900
Mana Cost: 100
Cooldown: 36/33/30/27 seconds

2. Shukuchi (Hotkey: C)

Causes the Nerubian Weaver to move so fast as to become invisible. Any units passed through will take damage. Lasts 4 seconds
Level 1 – Nerubian weaver becomes invisible. 90 damage to units passed through.
Level 2 – Nerubian weaver becomes invisible. 100 damage to units passed through.
Level 3 – Nerubian weaver becomes invisible. 110 damage to units passed through.
Level 4 – Nerubian weaver becomes invisible. 120 damage to units passed through.
- Damage type: magical
- Can only damage a unit once per cast.
- 0.25 second fade time
- Area of Effect: 175
Mana Cost: 60
Cooldown: 12/10/8/6

3. Geminate Attack (Hotkey: K)

Occasionally the Nerubian Weaver will send out two swarms, attacking an opponent twice. You must do an ordered attack to activate this.
Level 1 – Nerubian Weaver sends out two attacks.
Level 2 – Nerubian Weaver sends out two attacks.
Level 3 – Nerubian Weaver sends out two attacks.
Level 4 – Nerubian Weaver sends out two attacks.
- Geminate Attack is an Orb Effect.
- The extra attack will never trigger attack effects (orb effects, bash and critical strike).
- Nerubian Weaver needs an attack order for this ability to activate.
- The attack in which this skill procs is considered an Orb Effect Buff Placer, while the bonus attack is considered only an Orb Effect.
- Can affect towers.
Mana Cost: N/A
Cooldown: 6/5/4/2.5 seconds

4. Time Lapse (Hotkey: T)

Warps the Weaver 5 seconds back in time, resetting the HP, Mana and position. Does not affect cooldown, gold or experience.
Level 1 – Warps Nerubian Weaver 5 seconds in the past.
Level 2 – Warps Nerubian Weaver 5 seconds in the past.
Level 3 – Warps Nerubian Weaver 5 seconds in the past.
Mana Cost: 150/75/0
Cooldown: 60/50/40
- Removes negative buffs from Nerubian.

Skill Build
1.Shukuichi
2.Geminate Attack
3.Swarm
4.Swarm
5.Swarm
6.Time Lapse
7.Swarm
8.Shukuichi
9.Shukuichi
10.Shukuichi
11.Time Lapse
12.Geminate Attack
13.Geminate Attack
14.Geminate Attack
15.Stats
16.Time Lapse
17-25.Stats

Anub’seran The Nerubian Weaver Items Build

Start Of Game
  • Slipper of agility 2x
  • Ancient Tango of Essifation 2x
  • Health Potion 1x
Early Item
  • Wraith Band 2x
  • Power Treads
Mid-Late Item
  • Radiance / Yasha(Manta Style)
Luxury
  • The Butterfly
  • Monkey King Bar
  • Eye's of skadi
  • Buriza
  • Heart of Tarrasque

Choosing Lane

Try to lane with a stun/slow/disable.

Early game's Strategy

Do some decent harassing and play aggressive. But Concentrate on last-hits as you are item dependant. If your ally calls for a gank, help him out. Maintain your mana at least for one shukuichi to escape.

Mid Game Strategy

Why radiance purchased in mid game and not in the late game? If you're playing well, it will be easy for you to buy radiance before 20 minutes had passed. but if you can't buy yasha first, then upgrade it into manta style.
Late Game and War Strategy

You should have gotten at least 2 or 3 of the luxury items in your Mid-Late Item Build. Whenever war is occured, you must targeting the weakest hero. You'll hard to die, Thanks for your ultimate skill. Don't be initiator even you have an amazing ulti, believe me, you enemy will targeting you first. If your team is good and you're playing well, the game should be over soon. 

That's all for Nerubian Weaver DotA Guide, Enjoy DotA Gamers ! Subscribe us for another hero and item guide, DotA AI map Download, and latest thing about DotA.

DarkTerror- Faceless Void DotA Guide


DarkTerror- Faceless Void DotA welovedotas.blogspot.com

The Roles of the Hero :
1. Carry(The Main Role)
2. Jungler


Capabilities :

  • Decent agility
  • Decent strength
  • Good escape mechanism
  • High base damage
  • Permabasher
  • Strong carry


Weaknesses :

  • Bad lane control
  • Low HP and EHP
  • Melee hero
  • Weak on early game
DotA  Darkterror Faceless Void's Skills :

Time Walk:

Level 1: 120 mana, 13 cooldown, 700 cast range, 300 AoE, 10% slow.
Level 2: 120 mana, 13 cooldown, 900 cast range, 300 AoE, 20% slow.
Level 3: 120 mana, 13 cooldown, 1100 cast range, 300 AoE, 30% slow.
Level 4: 120 mana, 13 cooldown, 1300 cast range, 300 AoE, 40% slow.
It has a short casting time when void raises his hands. When you travel you become invulnerable so you won’t take damage and cannot be targeted. It won’t remove rupture. Although the effect remains while you travel you won’t be damaged at all. This skill is similar to morphling’s waveform, but you won’t loose the control of the hero when you use it. When TW is finished there’s a small period when you cannot issue commands to faceless! Since you don’t have channeling spells just repeat the same command until void moves again. TW can be used under some spells like: ensnare/bite and those that are similar to these two.

Backtrack:

Level 1: 10% chance.
Level 2: 15% chance.
Level 3: 20% chance.
Level 4: 25% chance.
Whenever faceless receives damage (if the damage is above 6) there’s a chance that this skill will trigger and that it will heal void back. It works against all types of damage except: sunder. This skill won’t evade stuns even if the damage is backtracked! Silence and Doom and hex won’t disable this skill! Actually nothing can. Bactrack is one of the most relaiable skills of dota! A disabled skill (most passives can be disabled) has a chane of 0% to work while BT 25% from level 7 till the end of the game.

Time Lock:

Level 1: 10% chance per attack. 40 damage.
Level 2: 15% chance per attack, 50 damage.
Level 3: 20% chance per attack, 60 damage.
Level 4: 25% chance per attack, 70 damage.
It is the same as melee bash. The damage it deals is magical and avatar can block it, but the stun effect will work even if it doesn’t deal damage. The effect lasts twice as long on creeps and half on Roshan. Since the damage is magical you won’t get return damage when it triggers (except your base damage). Doom disables this skill and any other basher in your inventory.

Chronosphere:

Level 1: 3 Seconds, 150 mana, 165 cooldown, 500 cast range, 425 AoE.
Level 2: 4 Seconds, 175 mana, 165 cooldown, 550 cast range, 425 AoE.
Level 3: 5 Seconds, 200 mana, 165 cooldown, 600 cast range, 425 AoE.
This spell has a 0.5 casting time and there’s another little pause before it will stop the units. This spell only stops units and will never stop spells. Of course it will stop channeling since it is the same as a long duration stun. Avatar won’t work against this either. This skill won’t stop: omnislash, wards and spirits (like Exorcism) after they’ve been casted.


Skill Build

  1. Time Walk
  2. Time Lock
  3. Backtrack
  4. Time Lock
  5. Time Lock
  6. Chrono
  7. Time Lock
  8. Time Walk
  9. Backtrack
  10. Backtrack
  11. Chrono
  12. Backtrack
  13. Time Walk
  14. Time Walk
  15. Stats
  16. Chrono
  17. 17-25 : Stats
We get one level of time walk, since better players will normally nuke the hell out of faceless. With this we can get to safety if that happens. The reason why we get it one the first level is simple: good teams may try to do a three man gank on level 1 to get an early first blood.


Starting Item

  • Ironwood Branches  3x
  • Ancient Tango of Essifation
  • Healing Salve
  • Stout Shield/Quelling Blade
Core Item
  • Mask of Madness
  • Power Treads
Luxury
  • The Butterfly 
  • Battle Fury 
  • Buriza-do Kyanon 
  • Heart of Tarrasque
Situational
  • Poor Man’s Shield. It is cheaper alternative to Vanguard. 
  • Helm of the Dominator. Helm of the Dominator is a valid alternative to Mask of Madness. It’s really effective during the late game, upgrading it to Satanic.
  • Hand of Midas. Only get Hand of Midas if you’re able to farm it in timely manner or just skip it. 
  • Yasha. Yasha grants 16 agility (i.e. 16 damage and 16 IAS) and 15 AS, so it’s an item to consider. In case, Manta Style is the suggested upgrade, as it grants overall statistics and the Mirror Image ability. The clones won’t get stuck in the Chronosphere. On the other hand, the MS increase is totally useless.
  • Armlet of Mordiggian. It provides many useful bonus and has a strong synergy with Manta Style. Suggested for a very aggressive gameplay, since it more than doubles your DPS.
Choosing Lane

Take the upper lane on scourge, or the lower one if you are with the sentinel .

Early game's Strategy
You’re supposed to wait until the creepwawe reaches its safety zone (the tower), where you’ll be able to farm a bit. If the enemy group doesn’t play agressively, then you can play in the farming way. Concentrate on last-hits and deny. As long as no creep can be last-hitted, attack your own creeps under half HP to draw the lane towards your tower. There are some basic that i like (By : Oneatatime playdota Member) :

Creep Lure Technic:

If you are close to the melee creeps, and you issue an attack command against the enemy hero the creeps will start to attack you. Because of that your own creeps will attack the other creeps. If the creeps are close to you, and the tower isn’t attacking the enemy hero they will follow you even if the tower is hitting them. The towers priority is: those that attack the allied hero, the one that attacks the tower, the one that is close. This is all you have to know to accomplish the following movements:

If enemy creeps, are coming for the tower, and your creeps are still far, then: Stand next to the tower with the Hold Position key and when the creeps get close start to run backwards until you reach your own wave. If the enemy attacks the tower the tower will fight back, since no one else is hitting it, and you are already far away.

If the fighting is close to your towers attack range then you could lure the creeps by attacking the hero (you don’t need to hit him!) and running instantly backwards. This will draw all creeps towards your tower thanks to the simple AI. If you are close enough to the creeps they will attack you, even if you targeted the hero on the other side of the map.

Mid game's Strategy

At this time of the game, You can start to do gankingIf an enemy is farming on your lane, call for a gank or move to another one. You should be the one who has to kill, above all because of the expensive items you need to buy. 

When you do Pushing, Simply start Mask of Madness’ Berserk when the first creep gets below half HP: this will push your lane towards the enemy. As always, when you get close to the enemy, go back and farm neutral creeps. During this time, the enemies will most likely push back, and when the creepwave gets big enough, return, kill them all and repeat the aforementioned process. 

When you have nothing to do and all of your creepwave is already at the enemies’ tower then start to kill some neutral creep. Even if you’re ganked in the while, you’ll be able to escape and regenerate HP thanks to Time Walk and lifesteal.

Late game's Strategy

With a correct Chronosphere’s availment and good team members, you can defeat the enemy at their own towers. If the attack is finished, your team is retreating and you have at least half HP, then you should kill some ancient creep to regain it. It's carry's responsibility to drive his team to victory. In equally strong late game, The death of carry was very influential to the game. Don't be so proud of yourself and do committed suicide by come to the tiger's nest alone. XD

Okay, that's all for DarkTerror- Faceless Void Guide. Enjoy DotA Gamers ! 

Subscribe us for another hero and item guide, DotA AI map, and latest thing about DotA.


Kardel Sharpeye - The Dwarven Sniper DotA Guide


Kardel Sharpeye - The Dwarven Sniper  welovedotas.blogspot.comThe Roles of the Hero :

1. Carry(The Main Role)
2. Jungler


Capabilities : 


  • Have a Longest Attack Range
  • One of the best Carry on DotA
  • Easy to Last Hitting Creeps


Weaknesses :


  • Have a low Health Point and Mana Point
  • Assasinate(Sniper's Ultimate skill) consume a lot of mana


Drafting

Pick Kardel Sharpeye - The Dwarven Sniper if :

1. Your team lack of Carry heroes.
2. None of your enemies picking nuker hero type
3. You want to learn how to "Last Hitting".

Don't Pick Kardel Sharpeye - The Dwarven Sniper if :

1. Many of your enemy picking Nuker and Ganker type.
2. You like killing enemies that are being pursued by your ally.
3. You haven't read this guide.


DotA Kardel Sharpeye - The Dwarven Sniper's Skills


1. Shrapnel

Shrapnel-Kardel-DotA welovedotas.blogspot.com


Fires a ball full of shrapnel into the air. which promptly explodes, showering the target area in explosive pellets, enemy unit that walk in this area get damage and slowed. Deals 30% damage to buildings. Shrapnel Lasts for 9 seconds
Level 1 - 15% slow. 10 DPS
Level 2 - 20% slow. 20 DPS
Level 3 - 25% slow. 30 DPS
Level 4 - 30% slow. 40 DPS
Cast Range: 1800
AoE : 360
Mana Cost : 120


2. Headshot

Headshot-Kardel-DotA welovedotas.blogspot.com


A shot to the head deals bonus damage and stuns for a short duration.
Level 1 - 40% chance to deal 15 damage and ministun. 0.25 second duration.
Level 2 - 40% chance to deal 40 damage and ministun. 0.25 second duration.
Level 3 - 40% chance to deal 65 damage and ministun. 0.25 second duration.
Level 4 - 40% chance to deal 90 damage and ministun. 0.25 second duration.


3.Take Aim

Take Aim-Kardel-DotA welovedotas.blogspot.com


Kardel uses his dwarf engineering skills to make modifications to his rifle, enhancing the range of his rifle.
Level 1 - Adds 75 range
Level 2 - Adds 150 range
Level 3 - Adds 225 range
Level 4 - Adds 300 range


4.Assassinate

Assasinate-Kardel-DotA


Take time to draw a bead, and then deal a large amount of damage to the target at a huge range.
Level 1 - Deals 355 damage. Casting Range 2000. Mana cost 175. Cooldown 20 s.
Level 2 - Deals 505 damage. Casting Range 2500. Mana cost 275. Cooldown 15 s.
Level 3 - Deals 655 damage. Casting Range 3000. Mana cost 375. Cooldown 10 s.


Skill Build ( I like this build so much, just try it :D)


1.Headshot
2.Take Aim
3.Headshot
4.Shrapnel
5.Headshot
6.Assassinate
7.Headshot
8.Take Aim
9.Take Aim
10.Shrapnel
11.Assassinate
12. Shrapnel
13. Shrapnel
14. Take Aim
15. Stats
16.Assassinate
17.– 25. Stats


General Skill Build (I don't like this build cuz it cost a lot of mana to using shrapnel repeatly)


1.Headshot
2.shrapnel
3.Headshot
4.shrapnel
5.Headshot
6.Assassinate
7.Headshot
8.shrapnel
9.shrapnel
10.Take Aim
11.Assassinate
12. Take Aim
13. Take Aim
14. Take Aim
15. Stats
16.Assassinate
17.– 25. Stats


First Early Item


  • Slipper of Agility 2x
  • Tango 2x
  • Health potion 1x


2nd Early Item


  • Boot of Speed
  • Poor Man's Shield / Wraith Band 2x(If many of your enemy are melee, i prefer you to make poor man's shield)


Core Item


  • Power Tread's / Phase boots
  • Lothar Edge
  • MoM / Helm of Dominator
  • Yasha / Crysalys


Luxury Item


  • Monkey King Bar
  • Manta Style 
  • Buriza do Kyanon


Alternative Item


  • Magic Wand
  • Vanguard
  • Eye of Skadi
  • Mjolnir - Maelstrom
  • Boot of Travel


Read here if you think it is weird because i put Magic Wand on alternative item

Choosing Lane

You can choose on Mid lane or go with your team's babysitter.

Early game's Strategy

Mid Lane Strategy

In early game, Keep focus on farming. Last hitting creeps and sometimes hit your enemy. You have range advantage, that make you will be more profitable than the enemy in hitting case. But still, your priority is to farming. Hitting your enemy is just to make they afraid to come forward for farming.

Another Lane Strategy

When you go with your team's babysitter, you'll be more focused and easier for last hitting creeps. Lane Supports or Babysitters are Heroes who help their team's Carry control the lane in the early stages of the game. So usually, babysitters will harassing enemies heroes that are in your lane and ease you for farms.

Mid game's Strategy

When you have at least Lothar or Yasha+MoM it's time for you to show. When you do 1 on 1(Killing your enemy by your own), make sure your enemy doesn't have any disabler skill and most of your enemy is far away from you. This is the tips for you : You can see a little map on left bottom side, then see the big red dot. See is there many of your enemies are visibles on the map and far from you. The next condition is the place you want to do 1 on 1. Estimate the time that you need to kill your enemy with the time that the enemy's team need to come(See on the nearest tower that they could teleport on it).

War game's Strategy and Ganking's Strategy

Try to positioning yourself on the FoW. Your first target must be enemies disabler. If your team are the one who want to open the war, Do assasinate first from fog(Before your initiator open the war), then when the enemies disabler have use most of his skill, go ahead and kill all of them. If your enemy hitter(Usually Carry type) approaching you and the enemies disabler are dead, Just hit him if you have MoM/Dominator. I'm pretty sure you will win.(1 on 1 condition XD)

Late game's Strategy

When a long game are happen, change your boot's into boots of travel. It'll speed you up to defend after attack / attack after defend. When you attacking enemy base, use Shrapnel to enemies tower.


That's all for Kardel Sharpeye - The Dwarven Sniper DotA Guide.


Enjoy DotA Gamers ! Subscribe us for another hero and item guide, DotA AI map, and latest thing about DotA.

Lion The Demon Witch DotA Guide


Lion the Demon Witch DotA welovedotas.blogspot.com
The Roles of the Hero :
1. Support
2. Disabler(The Main Role)
3. Team's Roamer
4. Team's Ganker


Capabilities :

  • Have two skills that can disable the enemies, it is impale and voodoo.
  • have one skill which could instantly kills enemy, it is Finger of Death
  • all of his skills are active
  • killing the enemies on the early minutes is the main priority of lion


Weaknesses :

  • have a low health point and armor
  • difficult to use this heroes like other professional players (Impale on the ground, fog, shift queue, etc)
  • have a low damage


Drafting

Pick Lion The Demon Witch if :

1. You like to be your team's ganker and support. I made a poll here, and most people said that they like ganker and support roles

2. Most of your gold will be spent on items for the benefit of the team such as Animal Courier, Observer Ward, Sentry Ward, and Smoke of Deceit.

Don't Pick Lion The Demon Witch if :

1. You can not use heroes with full of active skill.

2. You haven't read this guide.

DotA Lion The Demon Witch's Skill :


Impale Lion the Demon witch welovedotas.blogspot.com1. Impale : The Demon Witch releases his demonic magics into the ground in order to thrust solidified rock spikes along a straight path. This sends all his enemies into the air, only to take damage on their painful impact with the ground.


Level 1 - 60 damages, lasts 0.5 second.
Level 2 - 130 damages, lasts 1 second.
Level 3 - 200 damages, lasts 1.5 seconds.
Level 4 - 260 damages, lasts 2 seconds.

Casting range: 500
Area of Effect: 150
Mana Cost: 100/120/145/170
Cooldown: 12

voodoo welovedotas.blogspot.com2. Voodoo : Transforms an enemy unit into a random critter, disabling special abilities.
Level 1 - Turns enemy into critter, lasts 1.25 seconds.
Level 2 - Turns enemy into critter, lasts 2 seconds.
Level 3 - Turns enemy into critter, lasts 2.75 seconds.
Level 4 - Turns enemy into critter, lasts 3.5 seconds.

Casting range: 500
Mana Cost: 110/140/170/200
Cooldown: 13

mana drain welovedotas.blogspot.com3. Mana Drain : Absorbs the magical energies of a target enemy unit by taking mana from it every 0.25 second.
Level 1 - 20 mana drained per second, lasts 4 seconds.
Level 2 - 40 mana drained per second, lasts 4 seconds.
Level 3 - 60 mana drained per second, lasts 4 seconds.
Level 4 - 120 mana drained per second, lasts 4 seconds.

Casting range: 750
Mana Cost: 10
Cooldown: 20/15/10/5


finger of death welovedotas.blogspot.com4. Finger of Death : Instantly rips at a target, attempting to turn it inside-out. Deals massive damage.

Level 1 - Deals 600 damage, 725 damage with Aghanim's Scepter.
Level 2 - Deals 725 damage, 875 damage with Aghanim's Scepter.
Level 3 - Deals 850 damage, 1025 damage with Aghanim's Scepter.

Casting range: 900
Mana Cost: 200/420/650(625)
Cooldown: 160/100/40


Skill Build

Level 1 - Impale
Level 2 - Voodoo
Level 3 - Impale
Level 4 - Voodoo
Level 5 - Impale
Level 6 - Finger of Death
Level 7 - Impale
Level 8 - Voodoo
Level 9 - Voodoo
Level 10 - Mana Drain
Level 11 - Finger of Death
Level 12 - Mana Drain
Level 13 - Mana Drain
Level 14 - Mana Drain
Level 15 - Stats
Level 16 - Finger of Death
Level 17-25 – Stats

Note : If you are on the mid lane in the early minutes, Take Mana Drain on level 2 and 4.


Early Item

  • Gauntlet's of Strength 2x
  • Ancient Tango of Essifation 2x
  • Lesser Clarity potion 2x
Note : Items on below purchased during early of the match. If your team's carry need courier, bought for him. 
  • Empty Bottle ( For roamer type / mid lane build)
  • Urn of Shadows
Core


  • Phase boot's
  • Kellen of Dagger/Force Staff
  • Eul's Scepter of Divinity

Luxury


  • Dagon
  • Aghanim's Scepter

Alternative


  • Magic Stick
  • Ghost Scepter
  • Observer's Ward(Support Type)

Before you read the strategy Just read How to use Empty Bottle and another active item tips to ease you.

Choosing Lane

Become Lane support is the best choice for Lion. Lane Supports or Babysitters are Heroes who help their team's Carry control the lane in the early stages of the game.

Early game's Strategy

Help your team's Carry control the lane so helps him to farm easily. Since you are a ranged hero, you can use this to your advantage by harassing melee heroes that are in your lane. Do not use your ‘Impale’ to harass until you reach level 3. You may use it for a potential first blood or to save yourself and your ally from one. If you want to regenerate mana, use ‘Mana Drain’ on the enemy ranged creep.


Mid game's Strategy

As before, your role is to stay with your team and assist them in their kills. Use your ‘Finger’ only if your team has no long range damaging spells and no one will be able to reach him. Never aim for a kill for yourself. Also, ward/counter-ward the map. Hard to become babysitter, right?

Late game's Strategy

It will be hard for you in late game. Almost all of Lion's skill wouldn't be useful. If you are pushed, Stay away from enemy with "BKB". Assist your team with your stun and disables. If there is a frail enemy that can be killed with ‘Impale’ + ‘Finger’, kill him fast.

That's all for Lion The Demon Witch DotA Guide. Enjoy DotA Gamers ! Subscribe us for another hero and item guide, DotA AI map, and latest thing about DotA.
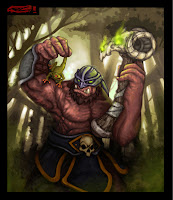


Alleria-Windrunner DotA Guide


windrunner-alleria welovedotas.blogspot.com
Roles :

1. Support(Primary)
2. Carry
3. Nukers


Capabilities : 

  • Good Attack Range
  • Full of Active Skill
  • Good Sight Range on night
  • Creeping just like piece of cake for Alleria(WR)


Weakness :

  • Hard to use Shackle Shot(WR First Skill) properly.
  • HP was to low.


Drafting

Pick Alleria-WR if :

1. If you love to play support. I make a poll here, and most people choose to liking support roles XD
2. Many of your enemy are hitter.
3. You are smart to read your enemy movements.

Don't Pick Alleria-WR if :

1. You can't use hero with many skill. Remember, All of WR's Skill is active.(And the item build usually too)
2. You haven't read this guide XD.


DotA Aleria-Windrunner's Skills


shackleshot dota WR welovedotas.blogspot.com1. Shackleshot : Alleria fires an enchanted arrow using wind magic that binds the target to an enemy unit or tree behind it.

Level 1 - Stun for 0.75 seconds, or 1.5 if close to enemy unit or tree.
Level 2 - Stun for 0.75 seconds, or 2.25 if close to enemy unit or tree.
Level 3 - Stun for 0.75 seconds, or 3 if close to enemy unit or tree.
Level 4 - Stun for 0.75 seconds, or 3.75 if close to enemy unit or tree.
Casting range: 600
Mana Cost: 90/100/110/120
Cooldown: 12
search angle : 26 degrees


Powershot dota WR welovedotas.blogspot.com2. Powershot : Windrunner winds up her bow for up to 1 second to perform a single powerful shot. The arrow travels 1700 distance, dealingdamage and destroying trees in its path. The damaged dealt is greatest to the first target of it hits and is reduced by 10% with each other it passes through.

Level 1 - Fires an arrow that shoots through targets with 120 initial damage, and 10% reduced damage for each other target hit.
Level 2 - Fires an arrow that shoots through targets with 200 initial damage, and 10% reduced damage for each other target hit.
Level 3 - Fires an arrow that shoots through targets with 280 initial damage, and 10% reduced damage for each other target hit.
Level 4 - Fires an arrow that shoots through targets with 360 initial damage, and 10% reduced damage for each other target hit.

Casting range: 1800
Area of Effect: 150
Mana Cost: 90/100/110/120
Cooldown: 9


Windrunner dota WR welovedotas.blogspot.com3.Windrunner : Imbues her body with the essence of wind, increasing her movement speed by 50% and giving her the ability to evade all physical attacks for short period of time. Additionally, the gusts of wind around her impairs the movement of nearby enemies, slowing their movementspeed in a 300 AoE around her.

Level 1 - Gives complete physical evasion, 50% increased MS, and slows nearby enemies by 8%
Level 2 - Gives complete physical evasion, 50% increased MS, and slows nearby enemies by 16%
Level 3 - Gives complete physical evasion, 50% increased MS, and slows nearby enemies by 24%
Level 4 - Gives complete physical evasion, 50% increased MS, and slows nearby enemies by 30%

Duration : 2.75/3.5/4.25/ 5 s
AoE : 300
Mana Cost: 100
Cooldown: 30/25/20/15


Focus Fire dota WR welovedotas.blogspot.com4.Focus Fire : Alleria channels wind throughout her body to surge an excess of adrenaline, giving her maximum attack speed. Damage is reduced in this state.


Level 1 - Constantly attacks with 50% reduced damage and maximum attack speed at the target
Level 2 - Constantly attacks with 40% reduced damage and maximum attack speed at the target
Level 3 - Constantly attacks with 30% reduced damage and maximum attack speed at the target

Duration : 20 s
Casting range: 600
Mana Cost: 200/300/400
Cooldown: 60(15*)
*With Aghanim’s Scepter


Skill Build


1. Powershot
2. Windrunner
3. Powershot
4. Shackleshot
5. Powershot
6. Shackleshot
7. Powershot
8. Shackleshot
9. Shackleshot
10. Focus Fire
11. Focus Fire
12. Windrunner
13. Windrunner
14. Windrunner
15. Stats
16. Focus Fire
17. Stats
18. Stats
19. Stats
20. Stats
21. Stats
22. Stats
23. Stats
24. Stats
25. Stats


I often play Alleria-Windrunner on the middle lane, but if you on another lane, take shackleshot first. Just in case your team want to do first blood. For Fast game build, you must take focus fire in level 6. Use it to destroy enemy's tower.


First Early Item


  • Ironwood branch 3x
  • Tango 2x
  • Clarity potion 2x
  • Courier(Support Type)


2nd Early Item


  • Empty Bottle
  • Boot of Speed


Core Item


  • Power Tread's
  • Mekansm
  • Orchid's Staff
  • Force Staff


Luxury Item


  • Monkey King Bar
  • Aghanim's Sceptre
  • Desolator

Alternative Item


  • Magic Stick
  • Vanguard
  • Eul's
  • Ghost Staff
  • Mjolnir
  • Observer's Ward(Support Type)


Before you read the strategy Just read How to use Empty Bottle and another active item tips to ease you.

Choosing Lane

Mid is best choice if you know how to use empty bottle. But if your team want to play fast game, Go to another lane.

Early game's Strategy

Mid Lane Strategy

In early game, Keep focus on farming until you have empty bottle. After you buy empty bottle, buy observer ward and plug into Power Up place(There are many place you can choose to plug in the observer ward, i think you'll know by your own from your experience). Use powershot frequently for farming and scaring your enemy. If half of your enemy's HP has been lost, use shackleshot to kill him. Actually, using shackleshot is easy. Try to positioning yourself on the parallels between your hero, enemy creep, and the enemies hero. (Mid lane have a less trees, so your stun must be between enemies hero and creep)

Another Lane Strategy

When you play fast game with WR inside the team, The pro usually use 3 1 1 strategy(3 heroes on the left/right lane, 1 on mid, and 1 on another lane). Alleria-Windrunner often on solo lane. It ease for her to withstand by two enemies hero. But if not, you can become Semi-Carry for your team, As i said before, Farming is just like piece of cake for Alleria(use Powershot and you got 3 Creeps gold worth) XD

Mid game's Strategy

The Pro often arm Alleria(WR) with Mekansm. For my experience, you could have Mekansm on minute 12(With Boot of Speed and empty bottle, + Maid heroes XD). When your team do ganking, you must join it. It hard for Alleria to kill enemy one by one. And if you have Focus Fire, just use it on tower rather than heroes.

War game's Strategy and Ganking's Strategy

Try to positioning yourself on the parallels between your hero, enemy hero, and the enemies creeps or Trees, then use Shackleshot. Better if the stun is between enemy heroes. When your enemy hitter(Usually Carry type) approaching you, use windrunner, But don't run first. Just hit the enemy with all you have. Use mekansm to save your team's ace. don't use it for helping yourself.

Late game's Strategy

War on the late game determine who the winner. Counter attack is the best choice for you. Why? You have focus fire ! you can destroy enemy towers just in 5 seconds without any disruption.


That's all for Alleria-Windrunner DotA Guide. Enjoy DotA Gamers ! Subscribe us for another hero and item guide, DotA AI map, and latest thing about DotA.

DotA LoD 6.74 v5e Attack Speed Bug

Hi DotA Gamers! Do you ever see one of your enemies using a strange hero or a strange skill? They using bug and you don't know how to do bug?
I will share you some of bug at DotA LoD 6.74 to relieve your curiosity, as Compensation, please do not insult your enemies too much. I've been share some of DotA LoD bug


such like invisible bug, one hit killing, etc before. In this post, i'll share you DotA LOD Attack Speed Bug :


DotA LOD Attack Speed Bug

Requirement :

  1.  Windrunner-Aleria(Skill = Focus Fire)
  2.  Zeus-The Lord of Olympia (Skill= Static Field) / Darkseer (Skill = Ion Shell)

Skill's Sequence :

  • The first Ultimate skill : Focus Fire
  • Skill in the middle of Ultimate skill's : Static Field
  • Other than that is up to you
Guide:
  • Cast Alleria Ultimate on a creep but don't hit the unit.
  • Use Darkseer to kill that unit with his Ion Shell.
  • Let Windrunner to attack units with her own. Don't use attack command. You'll got permanent focus fire after that.

Okay, that's all for DotA LOD Attack Speed Bug. Hope you like it :D. If you have another bug that you discovered and want to share in this blog. Just let me know by comment or maybe you can email me :D.

Stay tune with DotA Gamers!! Subscribe our feed and follow us on Twitter so we can deliver you the latest DotA news, DotA AI, DotA LOD, DotA Guide and anything about DotA to you !

DotA Pudge-The Butcher Character Guide


DotA-Pudge-The-Butcher welovedotas.blogspot.comRoles :
1. Tanker(Primary)
2. Ganker
3. Support
4. Initiator


Capabilities : 
  • Have a good combination of skill
  • Big STR, Have a good defence on Magic damage too.
  • always included in the top 10 woDotA Best Save Replay.
  • Easy to Killing if you can Hooking enemy.


Weakness :
  • Your ability to read enemy mind challenged here.(Hook)
  • AGI and INT very low.
  • Hard to use for newbie.


DotA Pudge-The Butcher's Skills


DotA-MeatHook welovedotas.blogspot.com1. Meat Hook : Launches a bloody hook at a unit or location. The hook will snag the first target it encounters, dealing damage then dragging the victim back to the Butcher.
Damage : 90/180/270/360(Pure Damage)
Casting range:600/800/1000/1200
Area of Effect: 100
Mana Cost: 110/120/130/140
Cooldown: 14/13/12/11

DotA-Rot welovedotas.blogspot.com2. Rot: Pudge releases the disease and filth inside of him, dealing intense damage and slowing surrounding enemies while hurting Pudge as well. 
Damage : 35/60/85/110 dps(Damage per Second)
Reduces movement speed of enemies by 20%.
Area of Effect: 250 
Duration: Until deactivated

DotA-Flesh Heap welovedotas.blogspot.com3.Flesh Heap : Pudge is made of innumerable rotting corpses, giving him extra protection against spells as well as the chance to add more to his bulk.
Level 1 - Gives Pudge 4% extra resistance to spells. +0.9 STR for each hero killed.
Level 2 - Gives Pudge 8% extra resistance to spells. +1.2 STR for each hero killed. 
Level 3 - Gives Pudge 12% extra resistance to spells. +1.5 STR for each hero killed. 
Level 4 - Gives Pudge 16% extra resistance to spells. +1.8 STR for each hero killed.
AoE for get STR : 525

DotA-Dismember welovedotas.blogspot.com4.Dismember: Chows down on a target, causing excruciating pain. Lasts 3 seconds.
Level 1 - 75 damage/second 
Level 2 - 125 damage/second
Level 3 - 175 damage/second
With Aghanim, DPS: + 0.75 * Strength 
Casting range: 160 
Duration: 3 seconds (heroes) / 6 seconds (creeps)
Mana Cost: 100/130/170 
Cooldown: 30


Skill Build

1. Meat Hook
2. Rot
3. Meat Hook
4. Rot
5. Meat Hook
6. Dismember
7. Meat Hook
8. Rot
9. Rot
10. Flesh Heap
11. Dismember
12. Flesh Heap
13. Flesh Heap
14. Flesh Heap
15. Stats
16. Dismember
17. Stats
18. Stats
19. Stats
20. Stats
21. Stats
22. Stats
23. Stats
24. Stats
25. Stats


Early Item

Read the guide for active item to ease you understanding it

  • Empty Bottle
  • Courier(Support Type)
  • Boot of Speed
Alternative Item
  • Bracer
  • Blade Mail
  • Vanguard
  • Observer's Ward(Support Type)

Core Item

  • Mana Boot's/Phase Boot's(I recommend use Mana boot's )
  • Hood of Dafiance
  • Force Staff
  • Aghanim's Sceptre

Luxury Item
  • Heart of Tarrasque
  • Khadgar’s Pipe


Drafting

Pick Pudge If :
1. If your team need a Ganker.
2. A lot of your enemies are carry.
3. You are smart to read your enemy movements.
Don't Pick Pudge if :
1.You favour Carry type heroes
2. Your enemy pick clockwerk. It will make you mad if you pick Pudge / Raigor. XD


Lane

Mid is best choice if you can reading your enemy movements and know how to play Fog. If you can't, you can go anywhere as you like. 

Early game's Strategy

Mid Lane Strategy

In early game, go wild on mid lane!!Focus to farming and if there are an opportunity to Hook, just hook them ! XD. Remember to buy Empty Bottle if you are in mid lane. It will help you out to go wild !

Another Lane Strategy

Your armour is low. And your body is so sexy, so play save is the best choice. If you have an opportunity, just go to another lane for ganking. 

Mid game's Strategy

When in mid game, you will do "ganking" easily. Just Hook your enemy then Bite them! XD. If you are pros, you can buy force staff to ease you. when your enemy running away from you, just use force staff and hook straight. It usually will hit.

War game's Strategy and Ganking's Strategy

When you do Meat Hook, Read your enemy movement. actually, it is easy. Just think what  you will do if you become them. Then hook at the place that you will moved arround. It is same as Mirana-PoTM

If you like, you can use shift Queueing trick. So right after you hook, you will also do "Dismember"

Late game's Strategy

It will be hard for you in the late game. Actually, in DotA, teamwork are everything. In Late game, teamwork will determine who will win. It is because, when someone do "blunder" in late game(Especially in the 60th minute ++) It mean the lose for the same team.


That's all for Pudge DotA Guide. Enjoy DotA Gamers ! Subscribe us for another hero and item guide, DotA AI map, and latest thing about DotA.

DotA Ulfsaar - The Ursa Warrior Hero Guide


DotA Ulfsaar - The Ursa Warrior welovedotas.blogspot.comRoles :
1. Tanker
2. Initiator
3. Semi-Carry(Primary)
4. Ganker
5. Nukers with hit XD

NB :  search on dota dictionary if you doesn't know what the meaning of.


Capabilities : 


  • Nuking enemy with his Overpower skill.
  • Good HP and armor.
  • Easy to use, recommend for newbie who want to become carry/killer.
  • Low mana needed.


Weakness :


  • Solo hitter.
  • Easy to avoided him. We can use ghost sceptre or blade mail.


Ursa's Skills


EarthShock DotA welovedotas.blogspot.com
1. Earth Shock : Slams the ground, dealing damage to and slowing the movement speed of nearby enemy land units. 4 seconds duration. 75 Mana cost.
NB : 70/120/170/220 damage, 25%/35%/45%/55% slow, AoE: 385, Cooldown: 6 s
Overpower DotA welovedotas.blogspot.com

2. Over Power: Sends Ulfsaar into a rage until he can expend his energy on a target. 400% increased attck speed. Last up to 15 seconds or when his attack limit is reached.
NB :3/4/5/6 attack, Duration : 15 s, Cooldown : 10 s

Fury Swipes DotA welovedotas.blogspot.com

3.Fury Swipes : Each attack opens the wound deeper in the target, causing subsequent attacks to deal increased damage. Duration 5 seconds.
NB: Passive.15/20/25/30 bonus per attack. Orb effect do not stuck. Pure bonus damage.
Enrages DotA welovedotas.blogspot.com

4.Enrage: When activated, greatly increases Ulfsaar's damage based on his current life. 15 seconds duration. 25 seconds cooldown.
NB: Level 1 - 5%/6%/7% of Ulfsaar's current life is dealt in damage.


Skill Build

Level 01 - Fury Swipes
Level 02 - Overpower
Level 03 - Fury Swipes
Level 04 - Earthshock
Level 05 - Fury Swipes
Level 06 - Enrage
Level 07 - Fury Swipes
Level 08 - Overpower
Level 09 - Overpower
Level 10 - Earthshock
Level 11 - Enrage
Level 12 - Earthshock
Level 13 - Earthshock
Level 14 - Attribute Bonuses
Level 15 - Attribute Bonuses
Level 16 - Enrage
Level 17 to 24 - Attribute Bonuses
Level 25 - Overpower


Early Item

  • Stout Shield
  • Boots of Speed 
  • Vladmir's Offering


Alternative Item

  • Bracer
  • Boot's of Travel


Core Item

  • Phase Boot's
  • Kellen of Dagger's / Lothar
  • Black King Bar
  • Armlet of Mordiggan
  • Vanguard

Luxury Item

  • Heart of Tarrasque
  • Assault Cuiras
  • The Butterfly


Drafting

  • Pick Ursa if you are newbie, you like to kill, you love to farms in neutral creeps.
  • Don't pick Ursa if your ally need a good carry.


Lane

You can go anywhere you like in the lane. Try to go with Support Hero.

Early game's Strategy

It is hard for ursa to farming in the first minute. But if your ally is Pro, You can easily "first blood"ing your enemy. Remember to buy Boot of speed first if you try to kill enemy. Just play save and pull your creep into neutral creeps. In early game, you must decided what roles its suitable with the gameplay. If your enemy have many INT heroes / Heroes with low HP, Ganker  is suited best. If your enemy have many Tanker heroes, try to become Semi Carry. This roles decided your item and how you play Ursa.

Ganker Roles Strategy
Farming in the lane will hard for you because your enemy is range hitter(INT hero usually Range). Just try to farming on the neutral creeps, and try to ganking sometimes(best if you mobile to another lane too). Remember to ganking enemy with a less disabler skill :D.

Semi Carry Strategy
If your enemy have many Tanker heroes, believe me they will focus on making blade mail. So Semi-Carry is your roles, Try to ganking another enemy which have low HP, and build your item faster then your enemy.

Mid game's Strategy

When in mid game, the second roles will decided on. Initiator or Ganker. When your ally doesn't have hero that can Initating, Kellen of Dagger's will helped you out. If you think that isn't important, you can buy Lothar.

War game's Strategy and Ganking's Strategy

Use Overpower and in one second your enemy will die XD. It is very easy, right? Ursa is Semi-Carry so it depended on its item. When on war, try to Blink with dagger / windwalk with lothar to enemy's disabler first.
It will more easy if you have BkB.

Late game's Strategy

It will be hard for you if your enemy have guinsoo in their hands. It is your team's fault if you have a very long gameplay. I never play > 40 minutes if i have Ursa on my team. It'll different if you have another carry on your team. Remember to read the guide about how to use Armlet of Mordiggan and Kellen of Dagger


That's all for Ursa DotA Guide. Enjoy DotA Gamers ! Subscribe us for another hero and item guide, DotA AI map, and latest thing about DotA.